Testing with Angular.JS
On Mar 5, 2014, I gave a talk for the Belgian Angular.JS Meetup group about testing. On this page you’ll find the annotated version of the slides I used that day.

If you don't feel like reading and just want the slides: download them here. There were a lot of code examples in this talk though, so you probably want to check the code examples below as well.
Let's go!
The obligatory introduction slide!
The web has always been this thing that I have a hate-love relationship with. I started out with web technology a long time ago and did loads of different things in the years afterwards: desktop development in the GNOME project, a company that builds mobile applications, … But I keep coming back to the web. In recent years it has become so much fun!
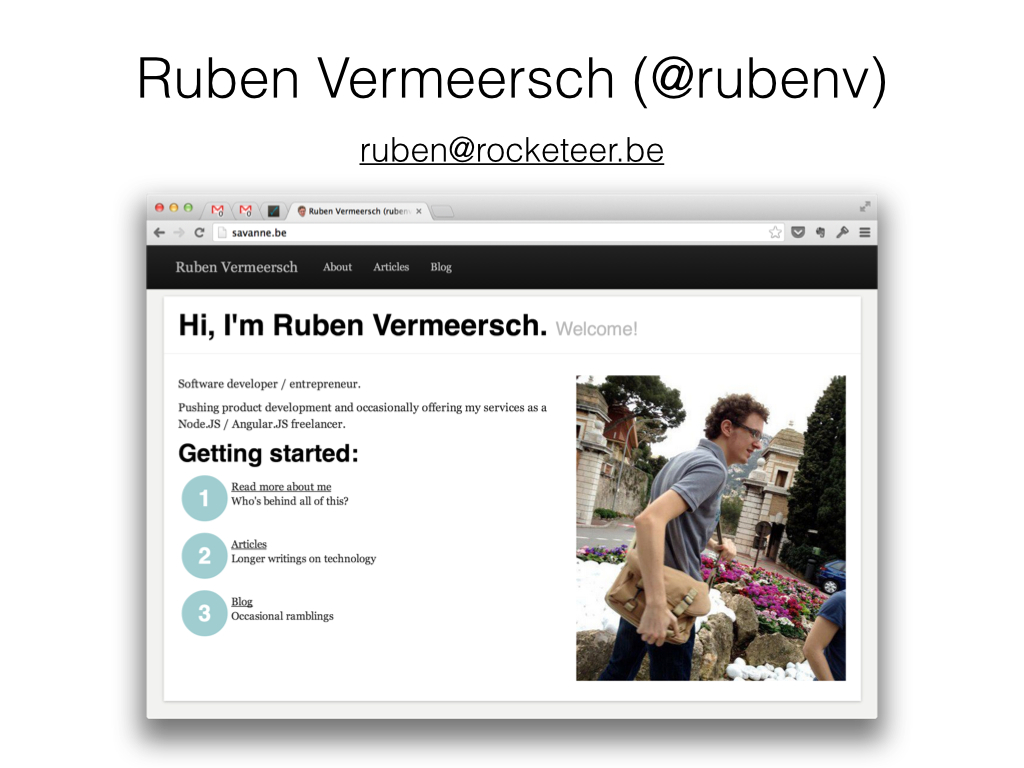
If you'd like to know more about me, just check the about page. My activities these days are Angular.JS and Node.JS, all day, every day. And that is why I was asked to give this talk.
Oh and while you're at it: I'm on Twitter too.
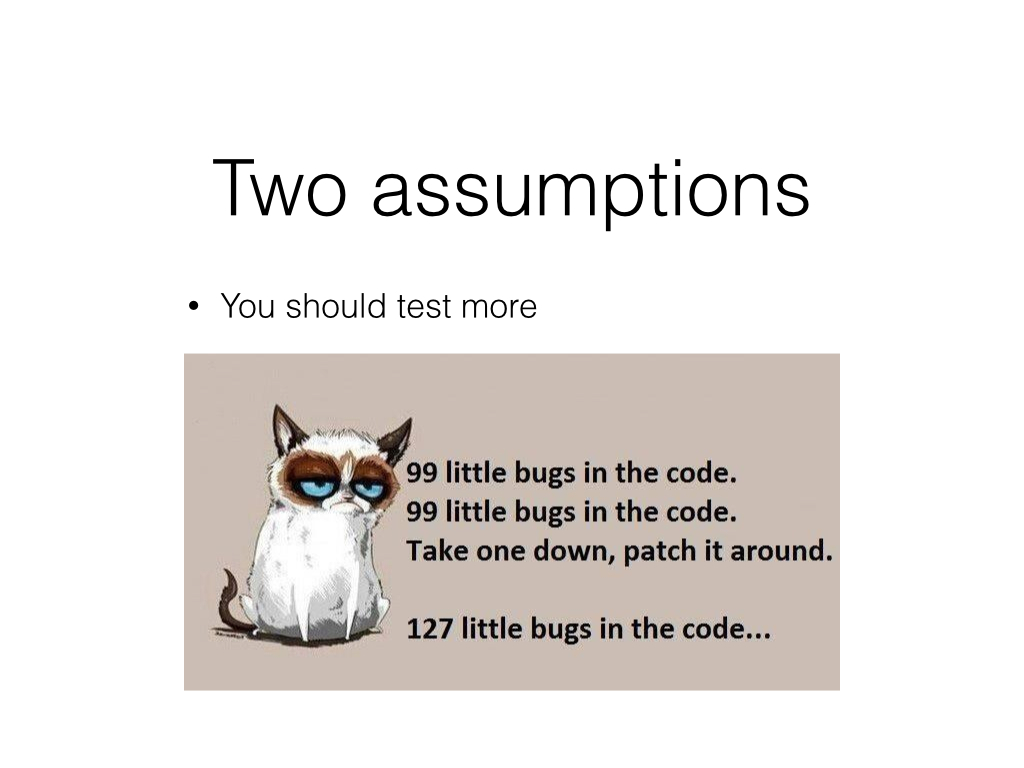
Two assumptions
I've made two assumptions while preparing this talk.
First one: you should test more. I will not try to convince anyone that you should test: the benefits of that should be obvious. I assumed that we agree on that one.
But we don't test enough, because it's just very hard to get started. This presentation should help with that. You'll see that it's not actually all that hard.
The second assumption is that you know what Angular.JS is and does. If not, check the tutorial first.
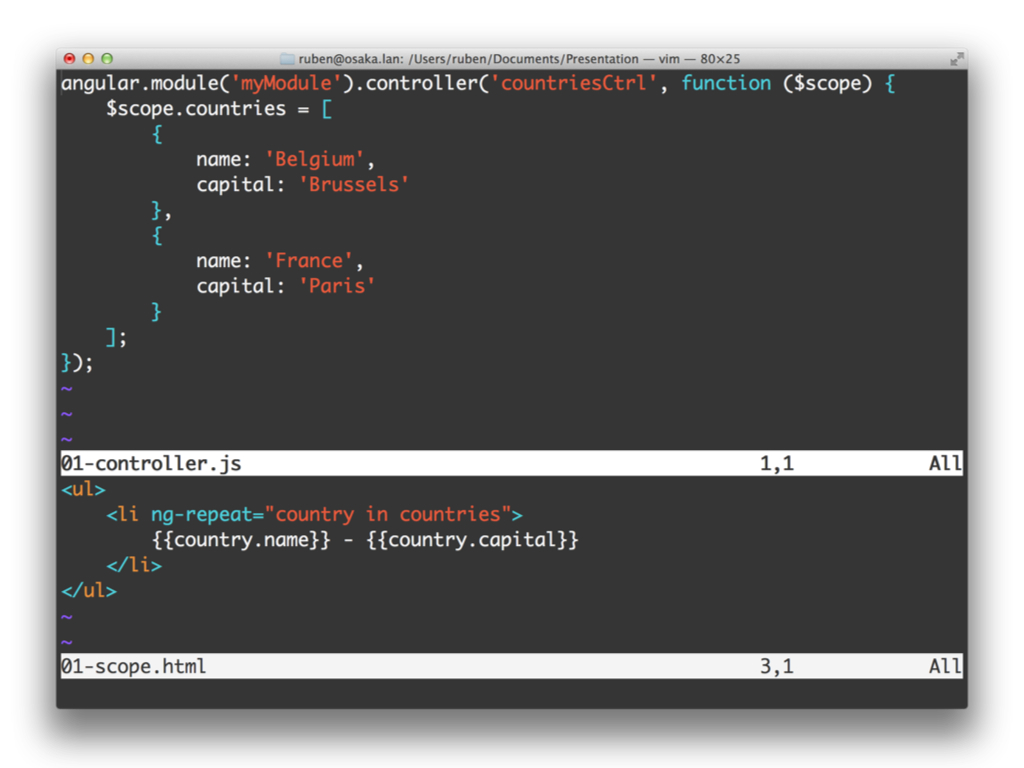
The most important fact about Angular.JS is that we try hard to not manipulate the DOM ourselves. Instead, there's this thing called $scope, which is just a plain standard object, but Angular.JS treats it in a special way. The scope gets injected in controllers, where you can manipulate it. For instance, in this example we set a small array on it.
We also annotate our HTML with special directives, e.g. ng-repeat. Angular.JS will then automatically synchronize the DOM and the scope. Magic!
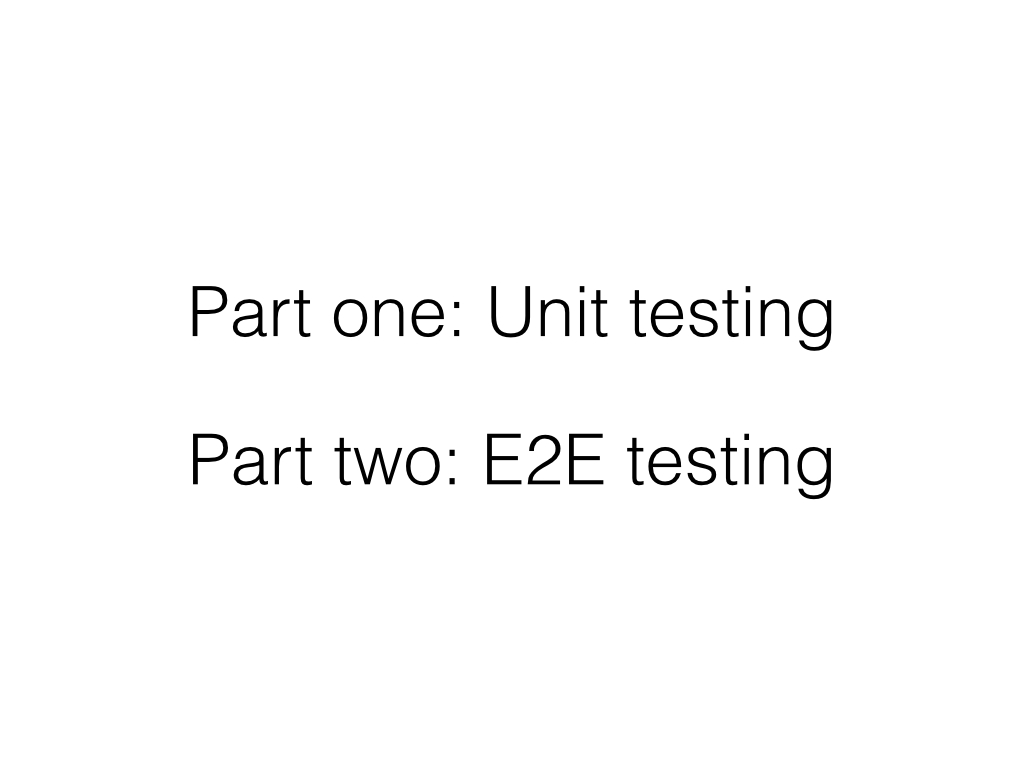
This talk is split in two parts: unit testing and E2E testing (we'll get to the difference between those in a minute). There will be drinks in between.
Each part is roughly: an introduction with a simple test scenario, how to get the tools up and running and then a bunch of tips & tricks for when it gets difficult.
You'll need to supply your own drinks if you're reading this at home.
Unit vs E2E
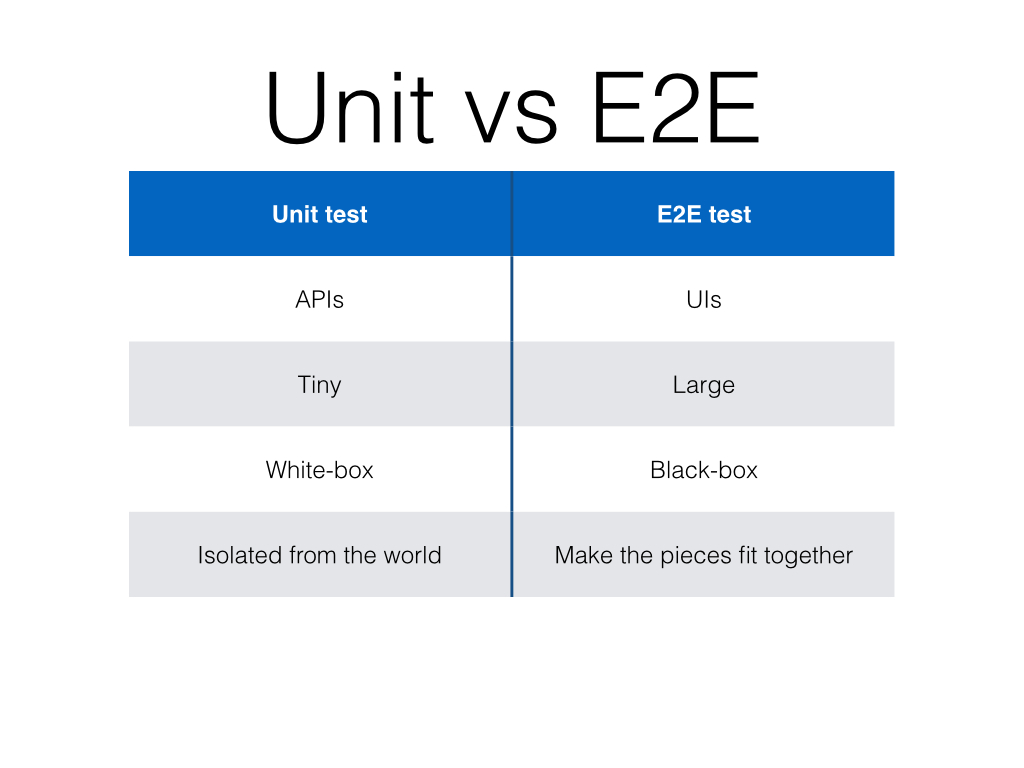
Unit tests and E2E (which stands for End-to-End and is sometimes referred to as Integration) tests are two very different things which serve different needs. But you do need them both.
Unit tests are generally about testing APIs, the direct result of our labor as a developer. It's the automated equivalent of writing some code and checking the output of console.log. They're isolated from the world to make it easy to simulate weird error conditions.
E2E tests verify that all the pieces fit together. We're no longer talking about code here: this is automated interaction with the user interfaces, which for us web developers means HTML in a browser.
Unit testing

Let me start out by saying that $scope is a truly wonderful thing. Not only does the scope shield us from much of the pain that comes along with DOM manipulation, it is also the thing that makes Angular.JS inherently testable. This testability comes from a decoupling of the logic we want to test and the visualization.
This is not a new idea in computer science: it was the idea behind MVC (but that never materialized) and it really came together in MVVM. The Angular.JS authors like to call their model MVW: Model-View-Whatever.
There are other modern frameworks that use this technique. It is a big shift in how we used to build web applications and in my eyes the reason why we can suddenly test frontend code, which was nearly impossible with older frameworks (a huge frustration I had with Backbone.JS).
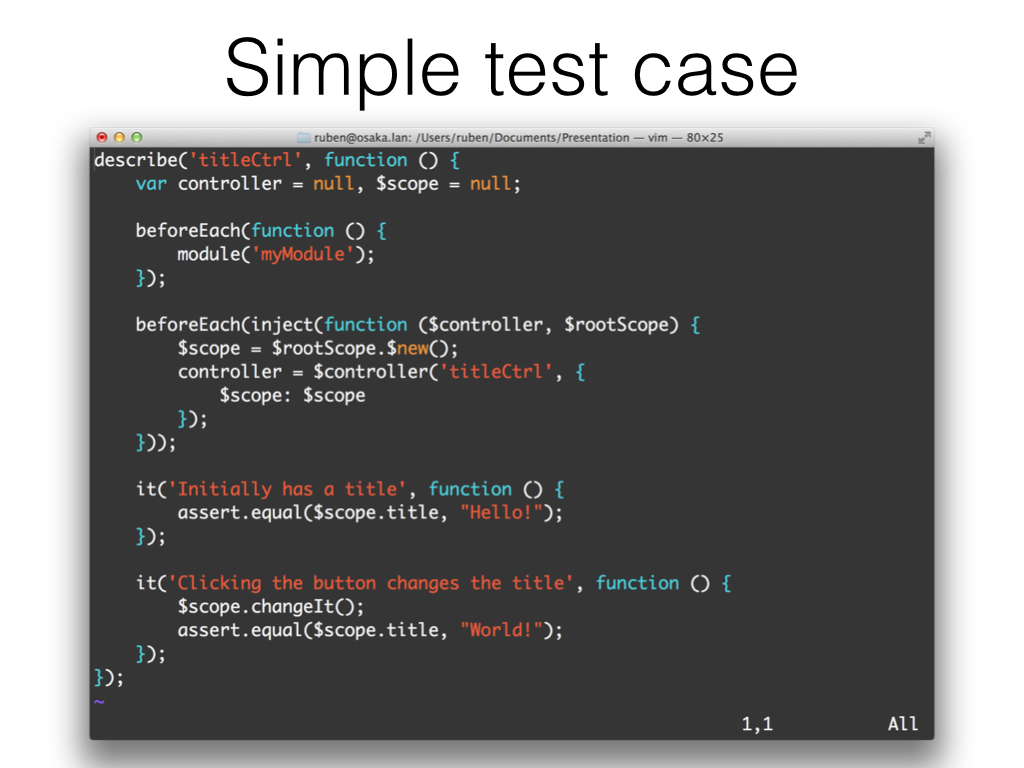
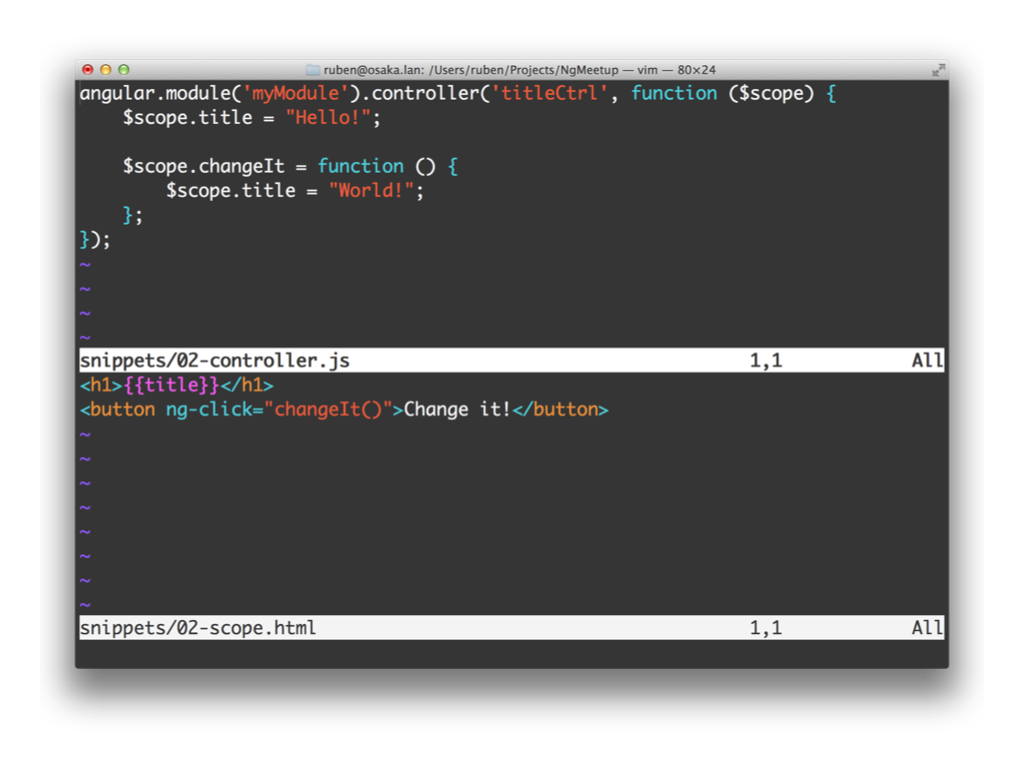
This super-trivial application will be the main example that I use. It is ridiculously trivial, yet complex enough to be able to show all the different things that matter. Real-life testing is a lot more complex, but the concepts are the same: once you know how to start, it is rinse and repeat.
In essence, it's a page with a title (Hello!) and a button. When you click on the button, the title changes. That's what we'll test.
angular.module('myModule').controller('titleCtrl', function ($scope) {
    $scope.title = "Hello!";

    $scope.changeIt = function () {
        $scope.title = "World!";
    };
});
describe('titleCtrl', function () {
    var controller = null, $scope = null;

    beforeEach(function () {
        module('myModule');
    });

    beforeEach(inject(function ($controller, $rootScope) {
        $scope = $rootScope.$new();
        controller = $controller('titleCtrl', {
            $scope: $scope
        });
    }));

    it('Initially has a title', function () {
        assert.equal($scope.title, "Hello!");
    });

    it('Clicking the button changes the title', function () {
        $scope.changeIt();
        assert.equal($scope.title, "World!");
    });
});
Here's a test case for this simple application. The first line contains a describe block. This is a way to group tests.
There are two beforeEach blocks:
-
Load the module that contains our application code.
Not everybody knows this, but an Angular.JS application can be instantiated inside of a div, completely separate from the rest of the HTML page. You could even have the same application on a page twice.
The unit testing framework uses this property to instantiate a clean environment for each test. The
modulefunction is a helper method to do this. Very neat! -
Inject the dependencies of the test using the
injecthelper method. We then create a new scope, to which we store a reference. Finally we manually invoke the$controllerservice, which constructs controllers. We pass it the scope we just gave.You can pass any dependency of the controller in this second argument. Any dependencies not specified will be resolved through the normal dependency injection mechanism.
Unit testing in Angular.JS is most of the time a matter of manipulating the scope and observing the behavior that follows. That's why we store a reference to it: we need it in the actual test cases.
Each test case is specified with an it function, which has a descriptive title and a function that performs the actual test.
The first test simply verifies a property of the scope in its initial state (is the title "Hello?").
The second test calls the changeIt method, as Angular.JS would have done for us when the user clicks the button. We then check if the title has actually changed.
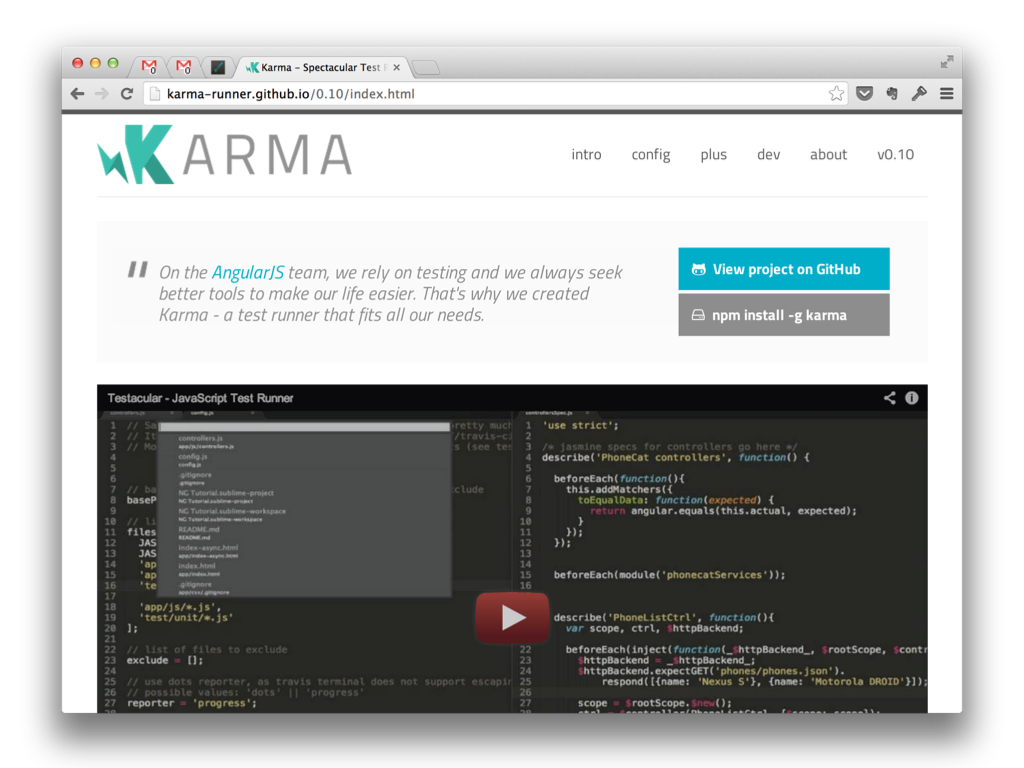
Karma
The tool that executes the tests in browsers is Karma, a test runner built by the Angular.JS team. While originally built specifically for Angular.JS, it is now usable with pretty much any framework.
Karma takes care of starting browsers, running the tests and reporting the results. Every browser we care about is supported and it integrates with most libraries and CI environments.
module.exports = function (config) {
    config.set({
        basePath: '',
        frameworks: ['mocha', 'chai'],
        files: [
            'bower_components/angular/angular.js',
            'bower_components/angular-mocks/angular-mocks.js',
            'src/*.js',
            'test/*.js'
        ],
        reporters: ['progress'],
        port: 9876,
        colors: true,
        autoWatch: true,
        browsers: ['Chrome', 'PhantomJS', 'Firefox'],
        singleRun: false
    });
};
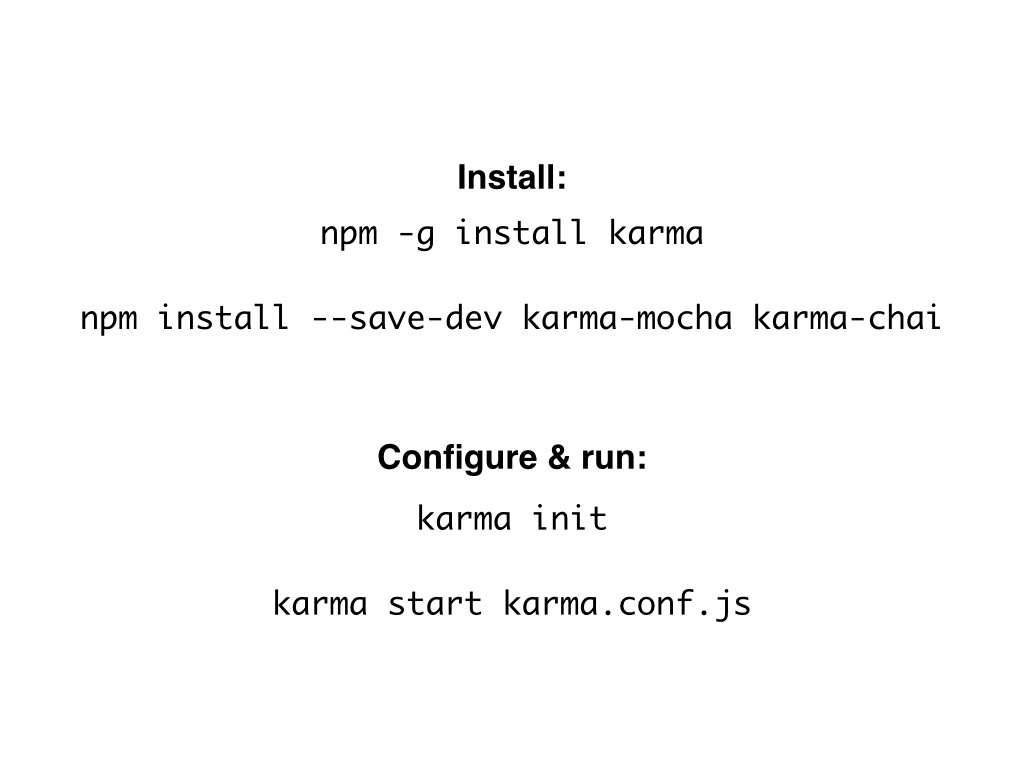
You can get karma through NPM. By default it comes with Jasmine, but I happen to prefer Mocha, which you can add by installing karma-mocha. The second framework I install is karma-chai, which provides the Chai assertion library.
Running karma init guides you through the creation of a configuration file. A comprehensive overview of supported options is available on the karma website.
In your configuration file there's a section for loading your source files. Besides any libraries you use, your source code and test cases, be sure to include the angular-mocks library. This library provides helper functions for stubbing out external dependencies.
Once that's done, just run karma start karma.conf.js to run your tests.
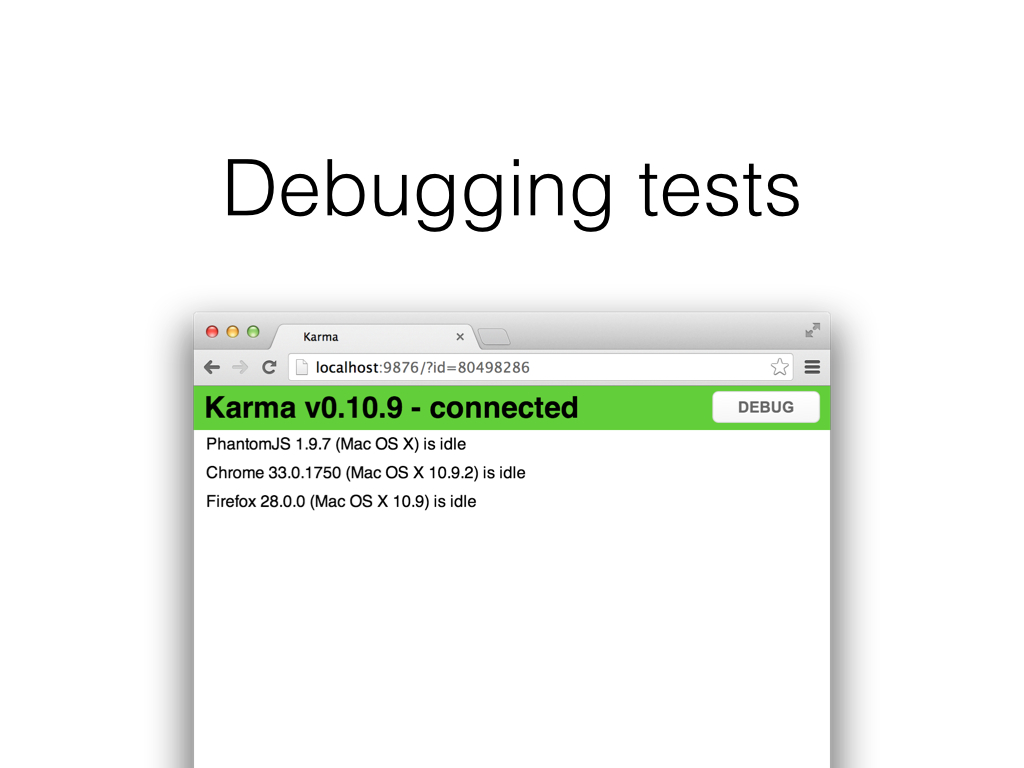
Debugging
Sometimes you'll run into a nasty test failure that needs debugging. For those occasions, there's a "Debug" button in the browser that Karma opened for you. Click on it and you'll get a new tab page that looks blank. Open your developer console to see what really happened: this seemingly blank page executes your tests. You can set breakpoints here and do the usual step-through debugging.
Hit reload to run the tests again.
Important thing to remember: close the browser tab once you're done debugging. Karma seems to be in a habit of blocking or losing track of your browser when the debug mode is open. This is annoying. Closing the tab and triggering the tests again fixes things.
HTTP-ified controller:
angular.module('myModule', []);

angular.module('myModule').controller('titleCtrl', function ($scope, $http) {
    $scope.title = "Hello!";

    $scope.changeIt = function () {
        $http.get('/api/title')
            .success(function (data) {
                $scope.title = data.title;
            })
            .error(function () {
                $scope.title = "Error";
            });
    };
});
HTTP-ified test case:
describe('titleCtrl', function () {
    var controller = null, $scope = null, $httpBackend = null;

    beforeEach(function () {
        module('myModule');
    });

    beforeEach(inject(function ($controller, $rootScope, _$httpBackend_) {
        $httpBackend = _$httpBackend_;
        $scope = $rootScope.$new();
        controller = $controller('titleCtrl', {
            $scope: $scope
        });
    }));

    afterEach(function () {
        $httpBackend.verifyNoOutstandingExpectation();
        $httpBackend.verifyNoOutstandingRequest();
    });

    it('Initially has a title', function () {
        assert.equal($scope.title, "Hello!");
    });

    it('Clicking the button changes the title', function () {
        $scope.changeIt();
        $httpBackend.expectGET('/api/title').respond(200, {
            title: "World!"
        });
        $httpBackend.flush();
        assert.equal($scope.title, "World!");
    });

    it('Handles errors', function () {
        $scope.changeIt();
        $httpBackend.expectGET('/api/title').respond(500);
        $httpBackend.flush();
        assert.equal($scope.title, "Error");
    });
});
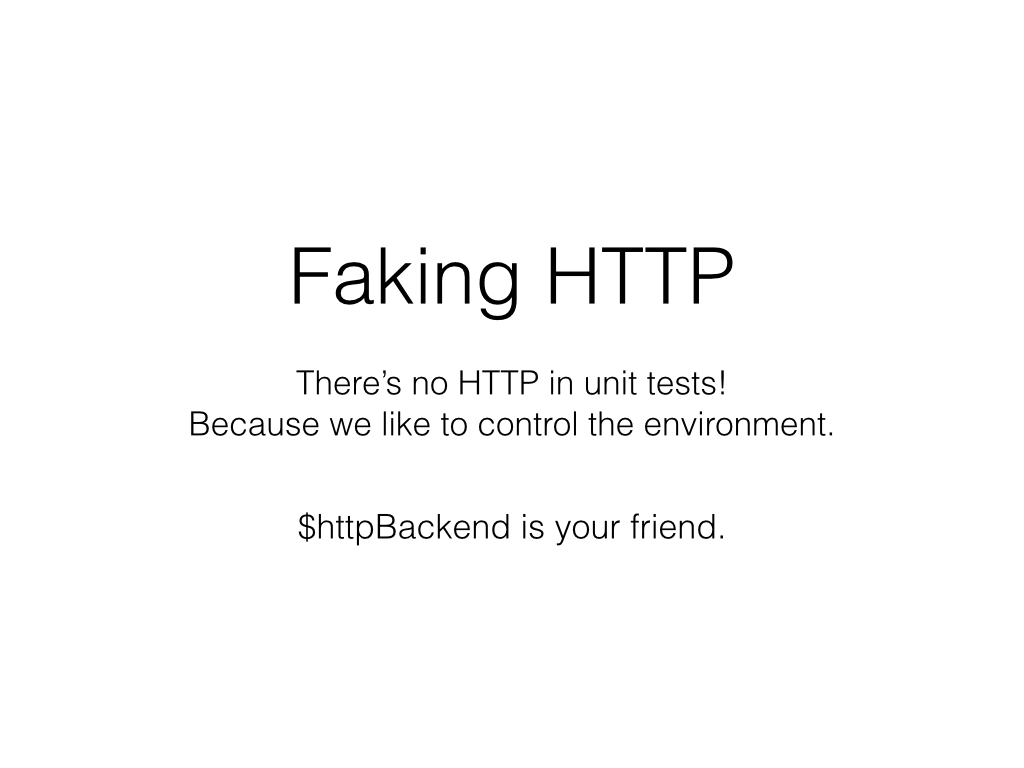
Faking HTTP
Unit tests run in complete isolation of the outside world. This makes them fast (we can replace slow external systems with fake fast ones) and powerful (we can simulate failures and other freak accidents).
This also means that there's no HTTP. The angular-mocks library provides an implementation of $httpBackend which disables all normal calls through $http. Instead, it allows creating mock responses. This gives us the exact control over network calls and allows you to verify that it does exactly what you want.
I modified the controller slightly to include a HTTP call: the changed title is now loaded over a fictive backend API (which doesn't exist, but it doesn't have to: we'll fake it).
In the test case, we inject a new dependency: _$httpBackend_. This is just normal $httpBackend (from angular-mocks). What you see is a clever trick that was built into inject: you can add two underscores, which it will ignore while resolving the requested dependencies. The benefit of this is that you get the dependency under a different name which makes it easy to assign it in a higher variable scope under its real name (notice how we store $httpBackend in the describe scope so that we can use it in the test methods).
Also new: an afterEach block that calls the verifyNoOutstandingExpectation and verifyNoOutstandingRequest methods of $httpBackend. These respectively check that there are no missing HTTP calls and no unexpected HTTP calls. Any behavior that differs from what is specified in the test case is considered invalid: exactly what we want.
In the last two test cases you see the specification of HTTP calls. We can either simulate success and return the data we want or simulate a failure. Try that when talking to a real backend.
Async controller:
angular.module('myModule', []);

angular.module('myModule').controller('titleCtrl', function ($scope, $timeout) {
    $scope.title = "Hello!";

    $scope.changeIt = function () {
        $timeout(function () {
            $scope.title = "World!";
        }, 5000);
    };
});
Async test case:
describe('titleCtrl', function () {
    var controller = null, $scope = null, $timeout = null;

    beforeEach(function () {
        module('myModule');
    });

    beforeEach(inject(function ($controller, $rootScope, _$timeout_) {
        $timeout = _$timeout_;
        $scope = $rootScope.$new();
        controller = $controller('titleCtrl', {
            $scope: $scope
        });
    }));

    afterEach(function () {
        $timeout.verifyNoPendingTasks();
    });

    it('Initially has a title', function () {
        assert.equal($scope.title, "Hello!");
    });

    it('Clicking the button changes the title', function () {
        $scope.changeIt();
        assert.equal($scope.title, "Hello!");
        $timeout.flush(4999);
        assert.equal($scope.title, "Hello!");
        $timeout.flush(5000);
        assert.equal($scope.title, "World!");
    });
});
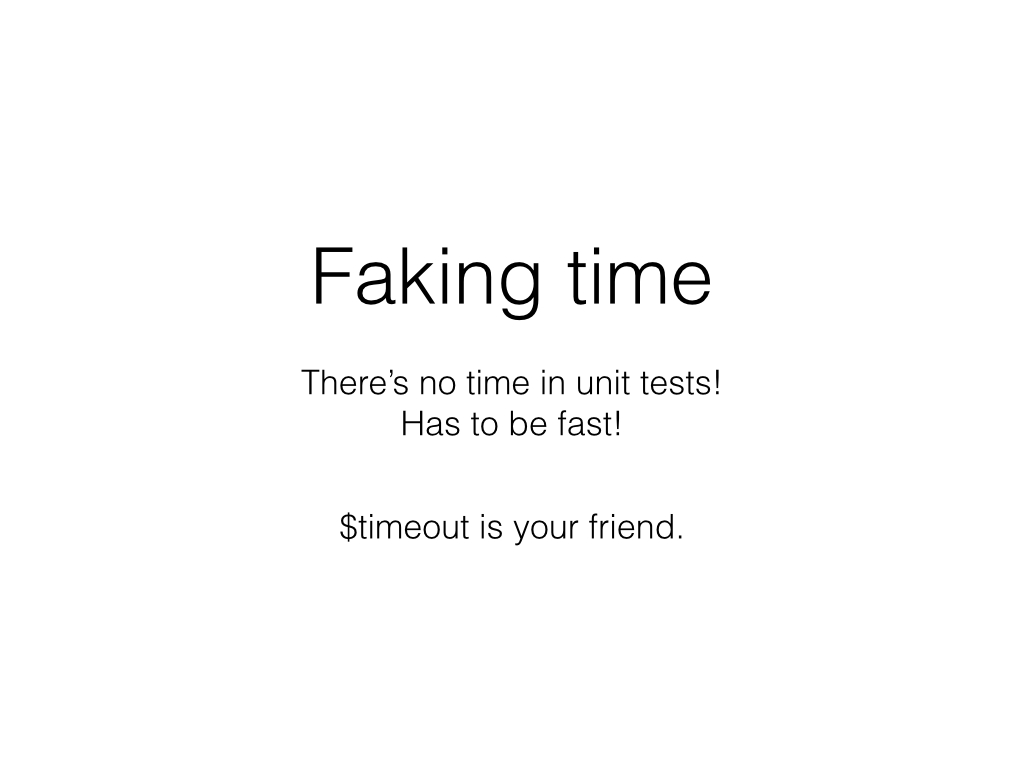
Faking time
There's no real time either. You need to manually control time in your unit tests. This allows you to precisely validate timed functionality and lets you test tricky async code in a synchronous way. But best of all: it eliminates the waiting from your tests, which means they're ridiculously fast.

$digest
Even the event loop is stopped during unit testing. Callbacks to promises won't happen automatically. You can push things forward by calling $rootScope.$digest(). Give it a go when things that should happen don't seem to be going forward.
You'll learn way more than you ever wanted to know about the Angular.JS digest loop during unit testing. This is a good thing, it's also a pain in the ass. Just know when to digest.
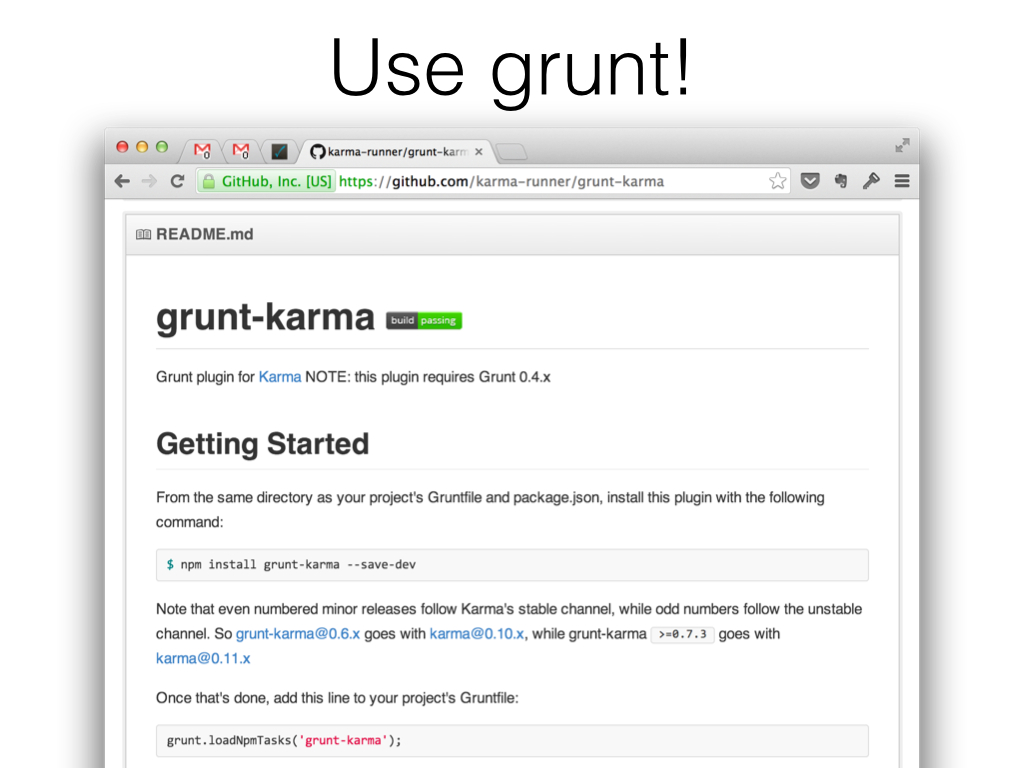
grunt
I don't work with karma directly in a real project. I strongly recommend using a tool like grunt to integrate testing into your build. There's a grunt-karma plugin that works great.
angular.module('myModule', []);

angular.module('myModule').factory('websocket', function () {
    return {
        listen: function () {
            throw new Error("Failed!"); // Connect to a websocket here.
        }
    };
});

angular.module('myModule').factory('backend', function (websocket) {
    var backend = {
        connect: function () {
            websocket.listen();
            backend.connected = true;
        }
    };
    return backend;
});

angular.module('myModule').controller('titleCtrl', function ($scope, backend) {
    backend.connect();
});
describe('titleCtrl', function () {
    var controller = null, $scope = null, backend = null;

    beforeEach(function () {
        angular.module('myMocks', []).factory('websocket', function () {
            return {
                listen: function () {
                    // Do nothing in test.
                }
            };
        });
        module('myModule');
        module('myMocks');
    });

    beforeEach(inject(function ($controller, $rootScope, _backend_) {
        $scope = $rootScope.$new();
        backend = _backend_;
        controller = $controller('titleCtrl', {
            $scope: $scope
        });
    }));

    it('Connects to the backend', function () {
        assert.equal(backend.connected, true);
    });
});
Replacing deep dependencies
I have this trick I use to replace deep dependencies during testing. It uses the fact that the Angular.JS module system has one global namespace. Just create a new module with the module to replace and load it after the original module.
Somebody in the audience pointed out that you could use $provide for this, which is probably the way to go.
E2E testing

End-to-end tests are the complete opposite of the low-level unit tests. Instead of small tests that verify individual components, we'll now be testing the whole application. We'll test this in the same way that users use the application: by interacting with the user interface.
Shortly: E2E is about browser automation.
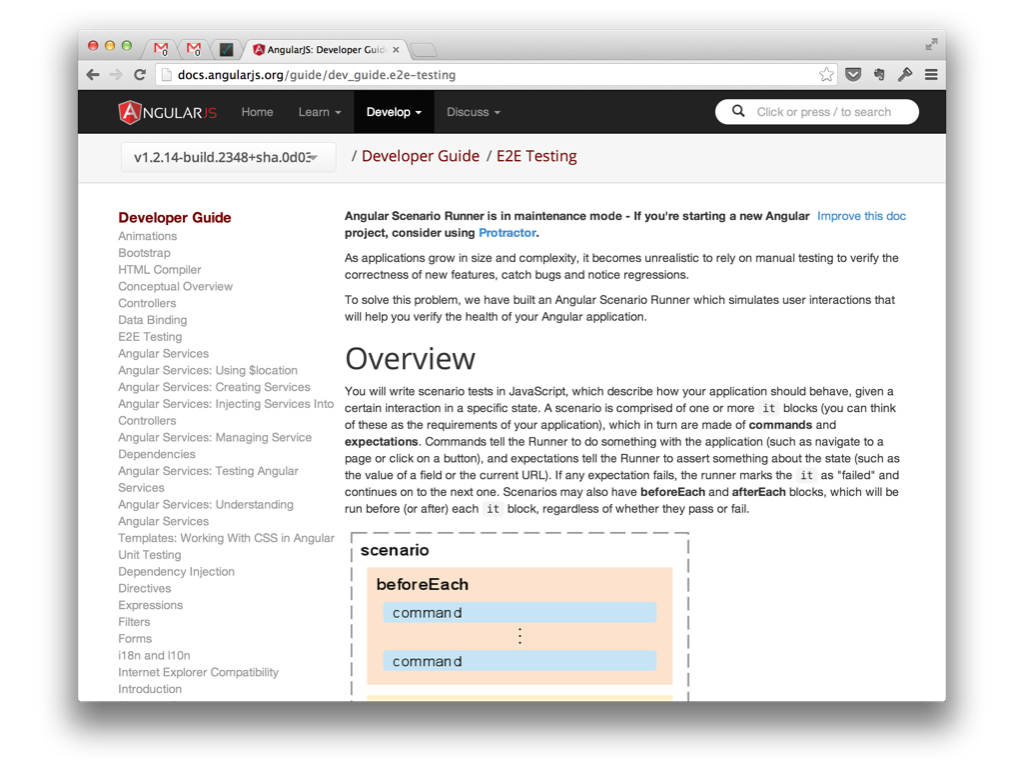
This is the page on E2E testing in the Angular.JS developer guide. It's a very long page that describes a framework named angular-scenario. Don't use it. It's no longer the recommended framework, instead you're advised to use Protractor. There's a tiny notice about this on top. It should be enormous and eye-catching.
There are also issues with angular-scenario and Internet Explorer and it is a pain in the ass to test things that aren't pure Angular.JS (e.g. external libraries).
Let's quickly move on.

The new framework for Angular.JS integration testing is Protractor. It's built specifically for Angular.JS and as of Angular.JS 1.2, the recommended way to do browser testing.
Protractor is a wrapper around Webdriver.JS with some specific additions to make your life a lot easier.
We'll use the same example application: a title and a button. Click on the button and the title changes.
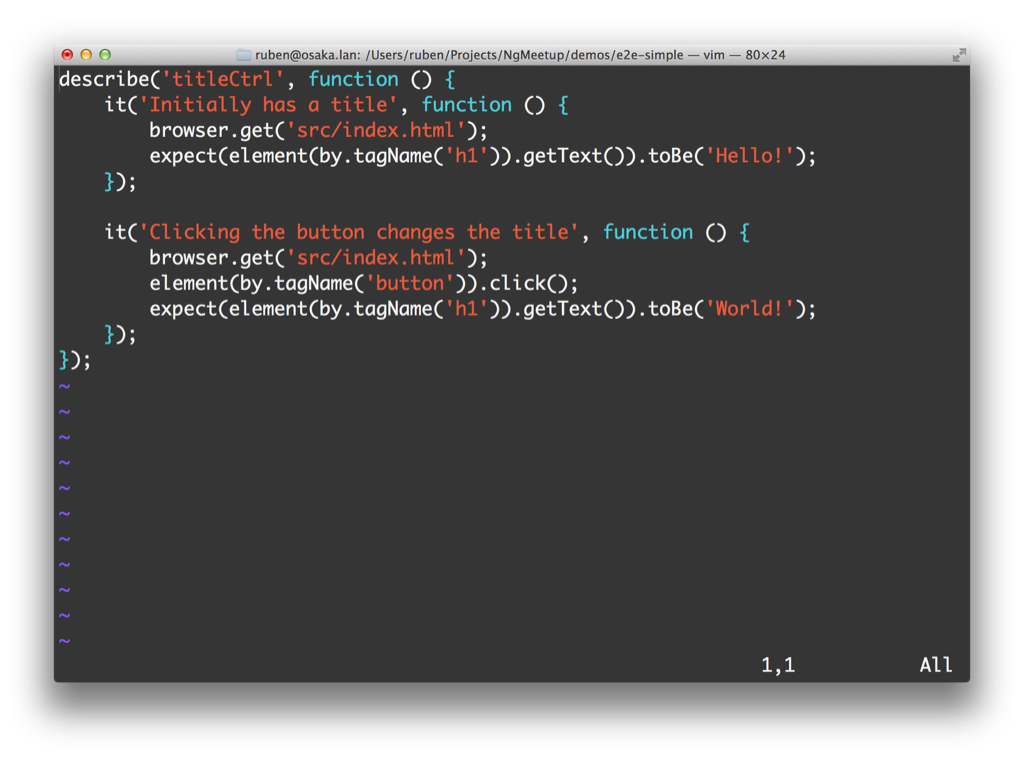
describe('titleCtrl', function () {
    it('Initially has a title', function () {
        browser.get('src/index.html');
        expect(element(by.tagName('h1')).getText()).toBe('Hello!');
    });

    it('Clicking the button changes the title', function () {
        browser.get('src/index.html');
        element(by.tagName('button')).click();
        expect(element(by.tagName('h1')).getText()).toBe('World!');
    });
});
Like unit tests, E2E tests are grouped into test suites and test cases, with describe and it respectively.
The assertion syntax is slightly different though. Your main workhorses will be:
expect: This method is used to construct expectations.element: Used to construct element matchers.
Both of these work fully asynchronous based on promises. Protractor uses all of these statements to build a command queue for the browser and will execute one after the other, while waiting for Angular.JS to do its thing between commands.
This clever design makes it ridiculously easy to write tests: they look like a sequential list of statements, while in reality they hide a complex asynchronous sequence of interactions.
Truly a beautiful API, once you get the hang of it.
exports.config = {
    specs: [
        'test/*.js',
    ],

    baseUrl: 'http://localhost:9000',
};
module.exports = function (grunt) {
    grunt.loadNpmTasks('grunt-contrib-connect');
    grunt.loadNpmTasks('grunt-protractor-runner');

    grunt.initConfig({
        connect: {
            dev: {
                options: {
                    port: 9000,
                    middleware: function (connect) {
                        return [
                            connect.static(__dirname)
                        ];
                    }
                }
            }
        },

        protractor: {
            options: {
                keepAlive: true,
                noColor: false,
                configFile: 'protractor.conf.js'
            },
            dev: {
                options: {
                    args: {
                        chromeOnly: true
                    }
                }
            }
        }
    });

    grunt.registerTask('default', [
        'connect',
        'protractor'
    ]);
};
{
  "name": "myApp",
  "version": "0.0.0",
  "description": "",
  "scripts": {
    "install": "./node_modules/protractor/bin/webdriver-manager update"
  },
  "author": "",
  "license": "MIT",
  "devDependencies": {
    "protractor": "~0.19.0",
    "grunt": "~0.4.2",
    "grunt-contrib-connect": "~0.7.1",
    "grunt-protractor-runner": "~0.2.3"
  }
}
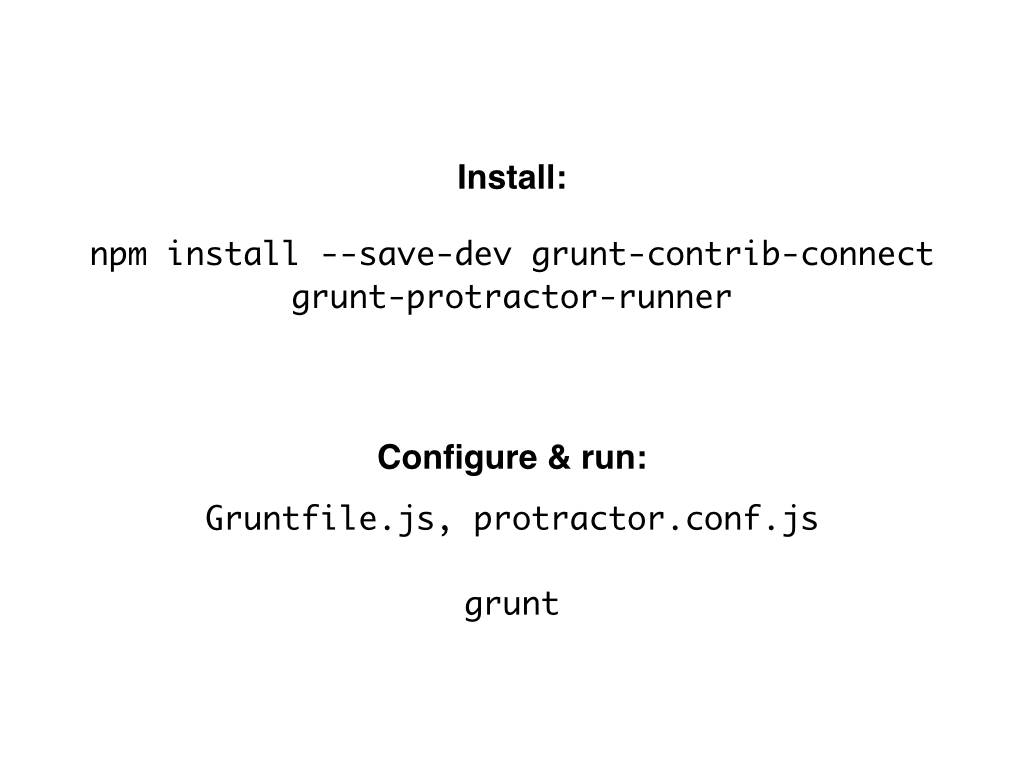
Protractor also comes through NPM. E2E testing is slightly more complex in the sense that you need to have a server somewhere that browsers can access. Therefore I skip the part about using Protractor stand-alone, you'll most likely never do, instead I'll directly show the integration with grunt.
I'm using two grunt plugins in this example: grunt-protractor-runner, which spawns Protractor and grunt-contrib-connect, which will provide the temporary HTTP server for our application.
The exact syntax / functionality of the Protractor configuration might change soon: it might become more aligned with the way karma works.
With this in place, running the tests simply becomes running grunt.
You'll need to have the Chrome Webdriver before you can run tests. Protractor provides a handy tool for that. For projects (not the stuff that goes into NPM), I use a little trick in package.json to make sure this command is always run when you execute npm install. This hack will probably come back to bite me, but for now it works nicely and ensures that all developers have the right webdriver at all times.
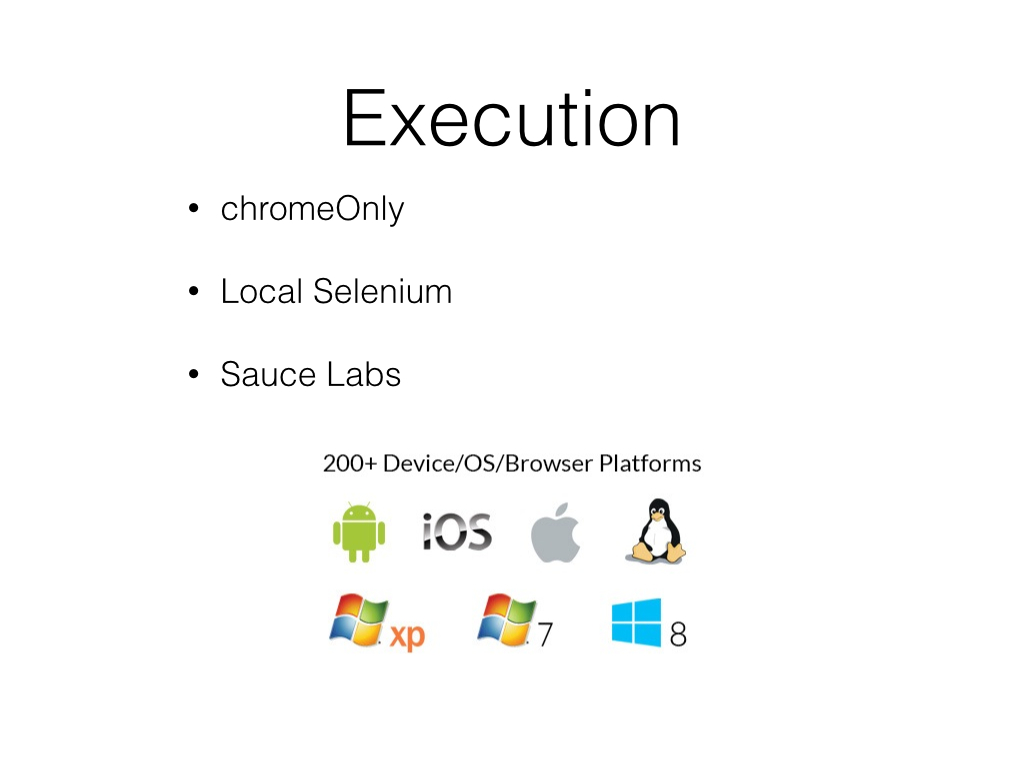
There are three execution modes in Protractor:
-
chromeOnly: The preferred development option, this bypasses Selenium and pokes at Google Chrome directly, which makes for very fast test execution. -
A local Selenium server (which Protractor can start for you if needed). Good for running browsers yourself during continuous integration.
-
Sauce Labs an online service that provides you with browsers-as-a-service, for pretty much any platform in existence. Ask for your free account if you are testing an open-source project.
E2E tests simulate the end-user interaction, which ultimately is about manipulating HTML through a browser. To do that we need to specify our tests in terms of that UI: we'll speak about the different DOM elements and what we expect from them.
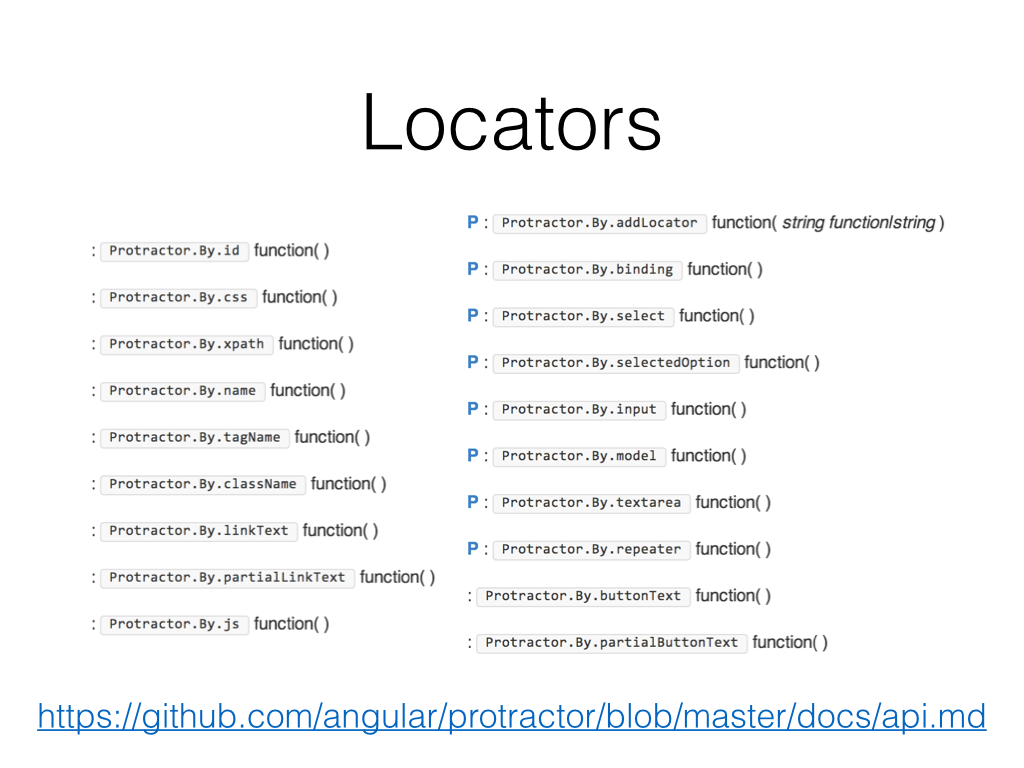
Protractor offers a very wide selection of locators. Some of them (like tagName) are very generic, others are specific to Angular.JS (like model, which matches an input field with ng-model).
What you should use is up to you and depends on what you want to test. You can make very specific tests (e.g. the second div after h1), but those will break as soon as you change something to the page layout (could be a good thing too). Or you can write extremely generic tests by talking purely about Angular.JS bindings, but those might also miss layout issues.
module.exports = {
    display: function () {
        browser.get('src/index.html');
    },

    header: element(by.binding('title')),
    button: element(by.buttonText('Change it!'))
};
var MainPage = require('./page');

describe('titleCtrl', function () {
    it('Initially has a title', function () {
        MainPage.display();
        expect(MainPage.header.getText()).toBe('Hello!');
    });

    it('Clicking the button changes the title', function () {
        MainPage.display();
        MainPage.button.click();
        expect(MainPage.header.getText()).toBe('World!');
    });
});
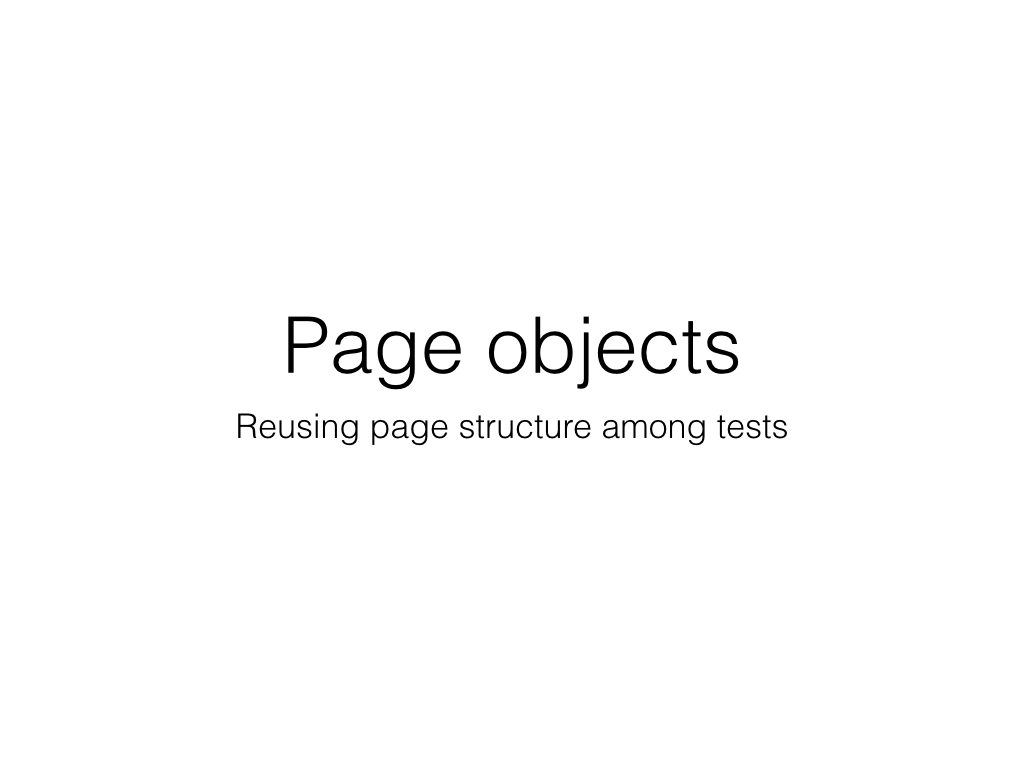
Page objects
E2E tests can get unmanageable fast: on a sufficiently complex page, you'll end up with rather complex selectors. Your tests will usually need updating when you change the page structure, which gets boring quite fast. This problem multiplies when you have lots of test cases.
There's a programming pattern that can reduce the pain somewhat: page objects. This pattern allows you to (somewhat) separate the structure mapping of your markup from the testing logic.
On the selenium website there's a documentation page for this pattern: PageObjects. Unfortunately it's written in Java, which makes it hard to apply this to Javascript.
The concept is quite simple though: put all selectors in an object that's reused between tests. Test cases are loaded by Protractor in Node.JS, so you can use standard require to reference files.
Notice how header and button are just plain properties. The element matcher is created right away, but Protractor will only match them against your page when needed. This is again an example of the clever things going on inside Protractor: you end up with very simple code and the test framework will resolve the headaches.
The test cases also turn into something that's much more readable. You can actually see what's going on now that the ugly details about page structure are gone.
Controller:
angular.module('myModule', []);

angular.module('myModule').controller('itemCtrl', function ($scope) {
    $scope.items = [ 1, 2 ];

    $scope.changeIt = function () {
        $scope.items.push(3);
    };
});
Page:
<!DOCTYPE html>
<html ng-app="myModule">
    <head>
        <script src="../bower_components/angular/angular.js"></script>
        <script src="controller.js"></script>
    </head>
    <body ng-controller="itemCtrl">
        <ul>
            <li ng-repeat="item in items">{{item}}</li>
            <button ng-click="changeIt()">Change it!</button>
        </ul>
    </body>
</html>
module.exports = {
    display: function () {
        browser.get('src/index.html');
    },

    button: element(by.buttonText('Change it!')),

    items: function () {
        return browser.findElements(by.repeater('item in items'));
    }
};
var MainPage = require('./page');

describe('titleCtrl', function () {
    it('Clicking the button adds an item', function () {
        MainPage.display();

        var rowCount = 0;

        // Capture row count
        MainPage.items().then(function (rows) {
            expect(rows.length).toBeGreaterThan(0);
            rowCount = rows.length;
        });

        MainPage.button.click();

        // Check that the row count is up
        MainPage.items().then(function (rows) {
            expect(rows.length).toBeGreaterThan(rowCount);
        });

        // Or alternatively, if Firefox is crap:
        browser.wait(function () {
            return MainPage.items().then(function (rows) {
                return rows.length > rowCount;
            });
        });
    });
});
Counting things
All the previous examples were quite trivial and I don't want to give you the impression that it's always trivial. Some things are really hard. Counting things is one of them. I'll give you an example of how I generally do it. This might not be the best way (it works), so if you know a better way: I'd love to hear it.
I've slightly changed the sample application for this example: it's now a list of items. When you click the button, an extra item is added.
Pop quiz: what happens if you click the button twice? Answer: it fails. Angular.JS does not allow duplicate objects in ng-repeat. This is related to the way Angular.JS tries to reuse DOM elements in ng-repeat (to make it fast). You can work around this with track by. Here are the gory details. Anyway, back to testing.
In the page object there's a new items function. This will return the result of findElements, which is a promise.
In the test case I first capture the row count and store it in a variable. After clicking the button, I'll do it again, this time expecting it to be greater than the last known value. The last bit is an alternative syntax which copes with Firefox failing sometimes.
All of this works, but probably not how you'd expect it to. What happens here is another nugget of Protractor magic. Each of the commands in the test case is executed immediately upon test instantiation. All of this happens before the browser is even started.
Internally Protractor creates a command queue that'll be executed step by step via webdriver.js. This queue isn't static: in the example new commands are created in the callbacks that happen after the MainPage.items() calls. These commands are added in the right place on the queue, so that it does what you'd expect.
But the beauty of it: all the asynchronous waiting is hidden from you. Unless Firefox tries to make your life worse, that is.
exports.config = {
    specs: [
        'test/*.js',
    ],

    baseUrl: 'http://localhost:9000',

    onPrepare: function () {
        var setup = function () {
            // Can't pass arguments directly (Function.toString!).
            var el = arguments[0];
            var username = arguments[1];
            var password = arguments[2];
            var callback = arguments[3];

            var element = angular.element(document.querySelector(el));
            var injector = element.injector();

            // Do something with $http
            var $http = injector.get('$http');

            // Or one of your application services
            var authentication = injector.get('authentication');
            authentication.store(username, password);

            // Done!
            callback();
        };

        browser.get('/');
        browser.executeAsyncScript(setup, 'body', 'ruben', 'password');
    }
};
Authentication & Session setup
Most applications are business applications and pretty much all of those require authentication. You can start each test case with jumping through the login page and navigating to the desired page, but that gets boring soon (also, it's very slow).
There's another way though: inject some data into your page before you actually do things.
Injecting code from the test runner into the browser happens through browser.executeAsyncScript. There's a few caveats: you can't pass arguments directly. The function you pass will be serialized using Function.toString, which only serializes the body. You can use the arguments array to get them back though.
From there on, use angular.element to grab hold of an element that contains your application. You can then get the dependency injector using the injector method. And then you have the keys to the kingdom: request any application service you want through the injector.
There's also a way to evaluate scope expressions. Have a look at the Protractor FAQ.
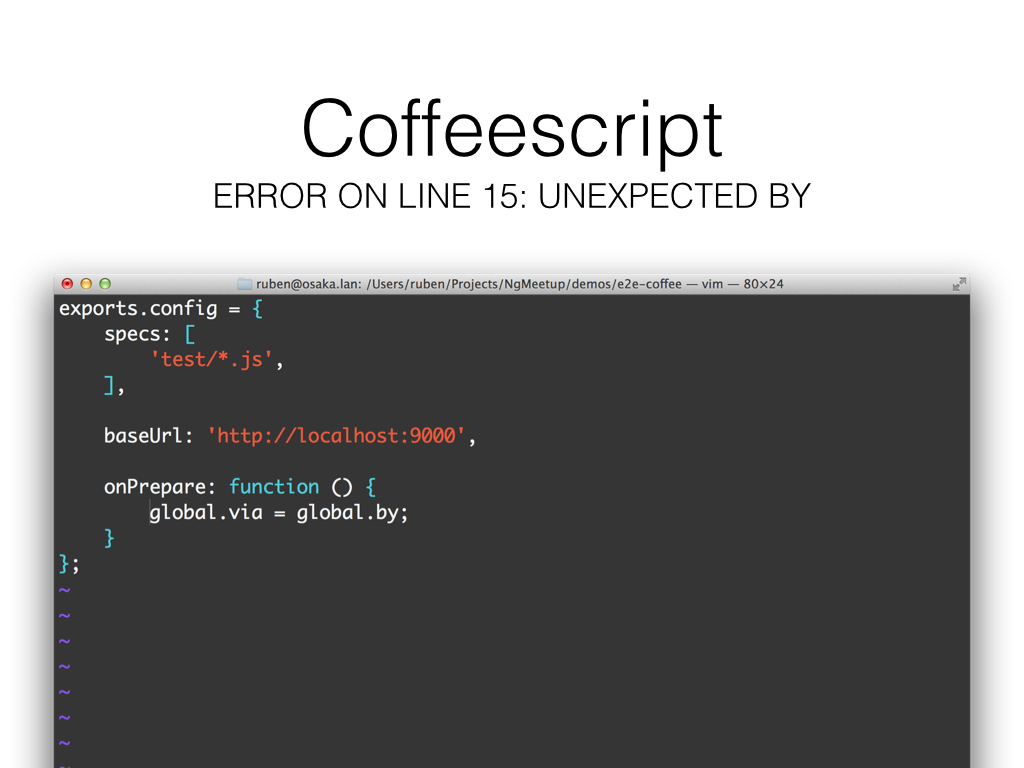
Coffeescript
The above causes one big problem if you try to use Coffeescript: by is a reserved keyword.
You can get around this by creating an alias for by in your onPrepare function. The global namespace in the browser is available as global.

Keyboards
One last thing. Inputting text happens through sendKeys. Dont try to simulate form submission by hitting the enter key with protractor.Key.ENTER. That one works in Google Chrome, but will fail you in Firefox. There's also protractor.Key.RETURN. It does exactly the same and it works in both browsers.
Time to wrap up. This was a rather quick (blame the good weather) write-up of almost two hours of interactive presentation.
I'd love to hear what you think, send me an e-mail or send me a tweet.
Thanks for reading all of this!
March 10, 2014 21:01